
How It’s Made: Bronze Sculptures By Cecilia Wren
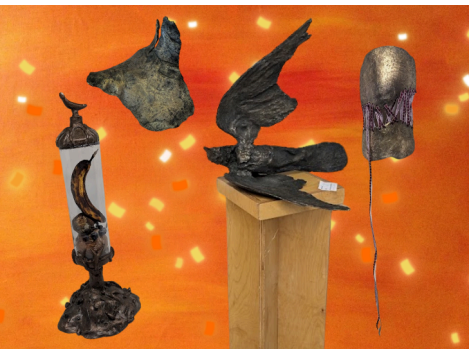
By Cecilia Wren

I am a sculpture student at Northern Arizona University and one of the things I love most about sculpture is the process. And bronze sculpture has one of the most involved processes. The process is long and tedious, but also so fun. For a few years I helped run the foundry at NAU, and it has been one of my favorite parts about going to art school. One important thing to know about bronze sculptures is that they are all hollow. The piece is not carved, but cast from molten bronze using a few different methods. I use lost wax casting with ceramic shell molds, but you can also do sand casting or standard investment. Every one of those processes takes over a week to complete which allows you to really think about the intentionality of what you are making, which is one of my favorite parts.
The first step is creating the original sculpture to take a mold of. To do this many people sculpt with an oil based clay called plasticine. Since the clay is oil based it will not dry if left out or shrink like water based clay. To make a bronze cast of a piece made with water based clay it would have to be fired already to eliminate the original shrinking inside the mold. After you create your original you take a mold of it using any number of methods. One of the most common ones is using a brushable silicone that you then place a hard shell, called a mother
mold, on top of. The silicone is flexible which allows for details to be preserved and for the removal of the piece easier.

You could also take molds of living things with a process called life casting. Life casting requires a special type of silicone that is body safe, one of the most common methods is a single use seaweed based silicone called Alginate. Alginate dries up after a few hours, so this method is best used when you only need one or two copies of what you are making. There are also options for multi use silicone that is body safe online. At my university, part of our sculpture curriculum was learning how to do life casting with face molds, but I have done knees, shoulders, necks, and torsos. For one of my projects for my foundry classes I did a series on chronic pain, taking life casts and then making the marks of the pain that the people I casted felt.
After you take the mold of your original object, you have to remove the mold and charge it with wax. There are certain types of wax that you use that have different harnesses and melting points depending on the level of detail and scale that you use. To fill the mold with wax you do a process called slush casting. You pour liquid wax into your mold to fill it about halfway full and then rotate the mold around to cover the whole inside with the wax. This usually takes a few passes to get the layers to build up, especially for larger molds. Another way is for more flat molds, like face molds, where you take a chip brush and brush in the wax to part of the mold. Once the wax is solid, you are able to remove it from the mold and start refining your cast.

After I get the wax cast out of the mold, I usually go back and add extra texture. For my series on chronic pain I did a cross hatched texture over the surface as well as carving into the wax to show the places and types of pain that my models felt. For other projects where I created multiples of one piece I went back and carved off the lines from the mold. After you go in and refine the cast you have to add vents and gates. Gates are the channels where you pour the molten metal into, vents are the extra shoots that allow the air that was in the mold to be pushed out and then replaced with the metal. You have to attach these all to the cup at the top that acts as the mouth of the funnel attached to the gates. This part can sometimes be frustrating if you have odd shaped sculptures. You have to make sure every part can get covered in the ceramic shell since the piece needs to be completely hollow, which means your sculpture might be cast in several parts, upside down, or attached to a tree of other pieces.

After venting and gating your piece, you start the process of covering your wax in the ceramic shell. Originally slurry would have to be constantly mixed with a large industrial mixer, but with SuspendaSlurry you just have to mix it before you dip your piece. The slurry starts as a nuclear
waste green when it is wet, but then dries to cheeto dust orange to tell you when it is dry and ready for another dip. First you dip your piece in the slurry and then cover it in a coat of silica stucco powder. There are a few different methods to getting your piece covered in the slurry and stucco. I used the cat box method where after you dunk your wax, you set it in a bed of the stucco and scoop the stucco overtop until the whole thing is covered. The silica stucco comes in two parts, A and B. You can use different ratios of each depending on what you are doing and personal preference. I used 3 parts of A and 3 parts of B for the stucco since I was scared of it cracking or not getting covered all the way. After your coats of slurry and stucco are completed, you wait for your piece to finally dry before it gets fired in a burn out kiln.
Burn out kilns are kilns designed to melt and catch the wax inside of the mold. They also fire the ceramic shell so it will be solid and can tolerate the 2,000 degree metal being poured inside. If you poured the bronze inside the mold before burning it out, it would turn into a big slush of wax and slurry, letting bronze spill out everywhere. After the wax is melted out and the ceramic shell is fired, the ceramic shell gets pulled out of the kiln and checked for cracks. If there are any major cracks it goes to cool and be fixed with another coat of slurry and stucco. If there aren’t any cracks then the ceramic shell gets ready to be cast with molten bronze.

Before you can even think about pouring the bronze, you need to start heating the foundry and preheat the bronze. The foundry takes about 5 hours to heat to temperature and melt the bronze. After everything has finally melted, the ceramic shell molds are placed in containers to make sure that they are upright. Inside of the foundry is the crucible that holds all the molten metal. It works kind of like a double boiler for chocolate, with a container for the bronze and a heating element on the outside. The foundry at NAU could hold about 90 pounds of bronze and took at least 4 people to operate. Two people to do the lifting and pouring, one person to open and close the lid of the foundry, and one person to check the molds to make sure they fill all the way. That is the bare minimum and it usually goes faster if there are several people making sure that the molds are upright and won’t fall over. After the metal is poured into the molds, they cool for about an hour and the ceramic shell is able to be broken off.

Ceramic shell molds are just one way to do the foundry process. There is standard investment where you create a giant ceramic block around your wax piece that is then burnt out over several days. Depending on the size of the piece this can add around a week to an already long process. Many people have switched to doing the ceramic shell molds because they capture the same amount of detail and don’t take as long. Another type is sand molds. They are usually not wax casts, but something else that dissolves or melts away is packed into sand, the metal is poured on top of it and replaces the material that was in there. The sand can leave a coarse texture on the piece once it is pulled out that might not be desirable for what you need. Sand casting is more common for iron pours than bronze for that reason.

There are many different ways to finish bronze pieces. I usually crack off the ceramic shell and use a combination of rotary tools and air tools to remove the extra remnants. If you need to weld your piece back together you need to use a sand blaster, a form of sanding that works by spraying sand particles at a high velocity almost like a dry version of a power washer, to make sure that you have a clean surface for welding. I try to make sure my pieces are in as few parts as possible so that way I don’t have to stress about the surface cleanliness, but I do like to make sure that everything is clean. For most of my pieces I choose to finish them with a patina and polish. I use a black patina made by heating the bronze and liver of sulfur, which smells so bad. After applying patina, I scrub with steel wool to add shine and mimic the way that bronze ages over time from people touching it. Black is not the only color of patina, another common one is the tiffany blue, made by adding the bronze to a tub of sawdust and ammonia. The longer you leave your piece in the tub, the more the color will spread.
While making a bronze sculpture is a heavily involved and expensive process that requires you to have access to a foundry, you can recreate the process using resin and bronze powder. Reynolds Advanced Materials sells bronze powder that you can mix with black resin to create a similar effect to the traditional bronze casting. This replicated process is called cold casting and it makes it a lot more accessible, even for people with no experience with any kind of mold making. If you are considering the cold casting process I recommend getting an extra slow cure resin rather than fast or medium, since the heat from the bronze will make the resin start to solidify, or kick, faster making it harder to work with.


0 Comments
There are no comments yet. Be the first one to post one!